


ARMOUR | Stainless Steel Water Filtration System
Stop guessing if your water is safe. The ARMOUR system delivers verifiably pure water with the style that modern living demands.
Additional Product Information
Why Choose the ARMOUR System?
Unquestionable Safety, Verifiably Pure: This is our foundation. We’re here to counter the “trust deficit” in water filtration. The ARMOUR is the official vessel for the legendary Coldstream FTO Plus filters, which surpass competitors in removing bacteria, heavy metals, chemicals, and other contaminants so you know your water is safe.
Elegant Design, Sustainable Choice: This isn’t your grandpa’s clunky purifier. With a sleek stainless steel housing, the ARMOUR is a stylish wellness appliance you’ll be proud to display. Plus, you get to ditch single-use plastic bottles—a win for your wallet and the planet.
The Premium Details That Matter: We obsessed over the details. The stainless steel tap provides a cohesive, high-end, and premium look (no cheap plastic here), and the rubber bottom means it won’t slide around your counter. It’s built for modern living.
How to Use the ARMOUR System:
Unpack your system. Each unit is individually wrapped in plastic to prevent scratching during transit.
Wash the stainless steel chambers and tap components with warm, soapy water and rinse thoroughly.
Install the two included Coldstream FTO Plus filters into the upper chamber, following the filter’s specific instructions.
Assemble the system: Attach the tap to the lower chamber, place the upper chamber on top, and put on the lid.
Fill the top chamber with water and let gravity do the work. (Pro-tip: Always discard the first full batch of water, just like breaking in new boots!)
Simple 4-Step Setup
STEP 1
Clean Start
- Wash hands thoroughly before handling the filters.
- Prevent contamination during set up.

STEP 2
Install Filters
-
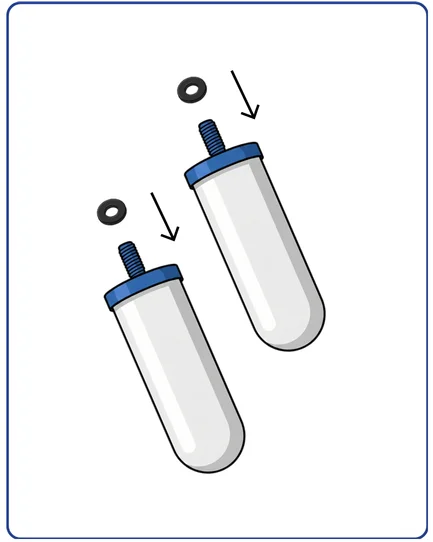
Place one washer on each filter stem.
-
Insert filters into the upper chamber.
-
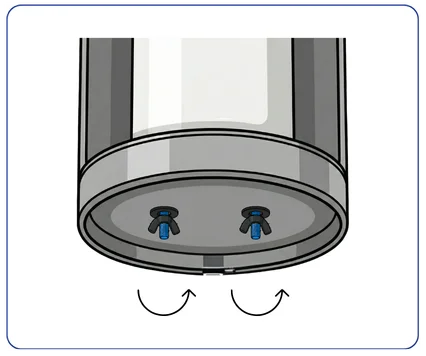
Secure with wingnuts from underneath.
Note: Hand-tighten only.

STEP 3
Attach Spigot
-
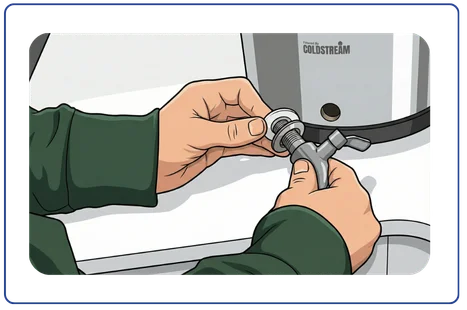
Place stainless steel washer, then rubber washer, on the spigot, facing the chamber wall. Insert spigot into the chamber hole.
-
Inside of the chamber, secure the spigot by placing another rubber washer, metal washer, and nut onto the spigot. Tighten firmly.

STEP 4
Assemble & Flush
-
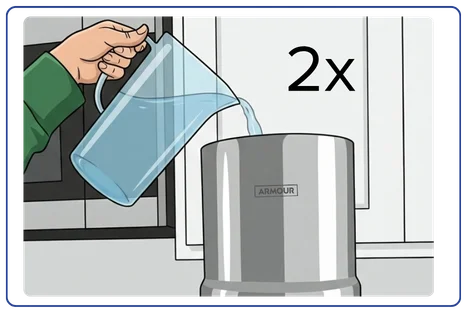
Flush 2x Cycles
-
Stack the chambers.
-
Fill the top with cold water. Filter and discard the first two full batches to clear loose carbon particles.

Reviews
There are no reviews yet.